
A daisyUI + Next.js template that converts your Lemon Squeezy API into an online store
Convert your Lemon Squeezy API data into a professional online store.
Introduction
Setting up an online store can be a complex task or a really expensive one. We recently added a new "Online Store Template" to daisyUI store which can help you build a professional online store with minimal effort. This template is built using Next.js and receives data from the Lemon Squeezy API. It is fully customizable and can be deployed to any platform that supports Next.js.
1. Installation
Get the "Online Store Template" from the daisyUI store and follow these steps to set up your online store:
Open the project and run the following command in your terminal to install the required dependencies:
npm installTo start the development server:
npm run devThis will run your site in development mode at http://localhost:3000
2. Configure your site
Add Lemon Squeezy API
By default, the site displays example data from the data/lemonsqueezy-products.example.json file. To connect your store to Lemon Squeezy, follow these steps:
Generate an API Key
- Log in to your Lemon Squeezy Dashboard.
- Create a new API key and copy it.
Add the API Key to the Environment File
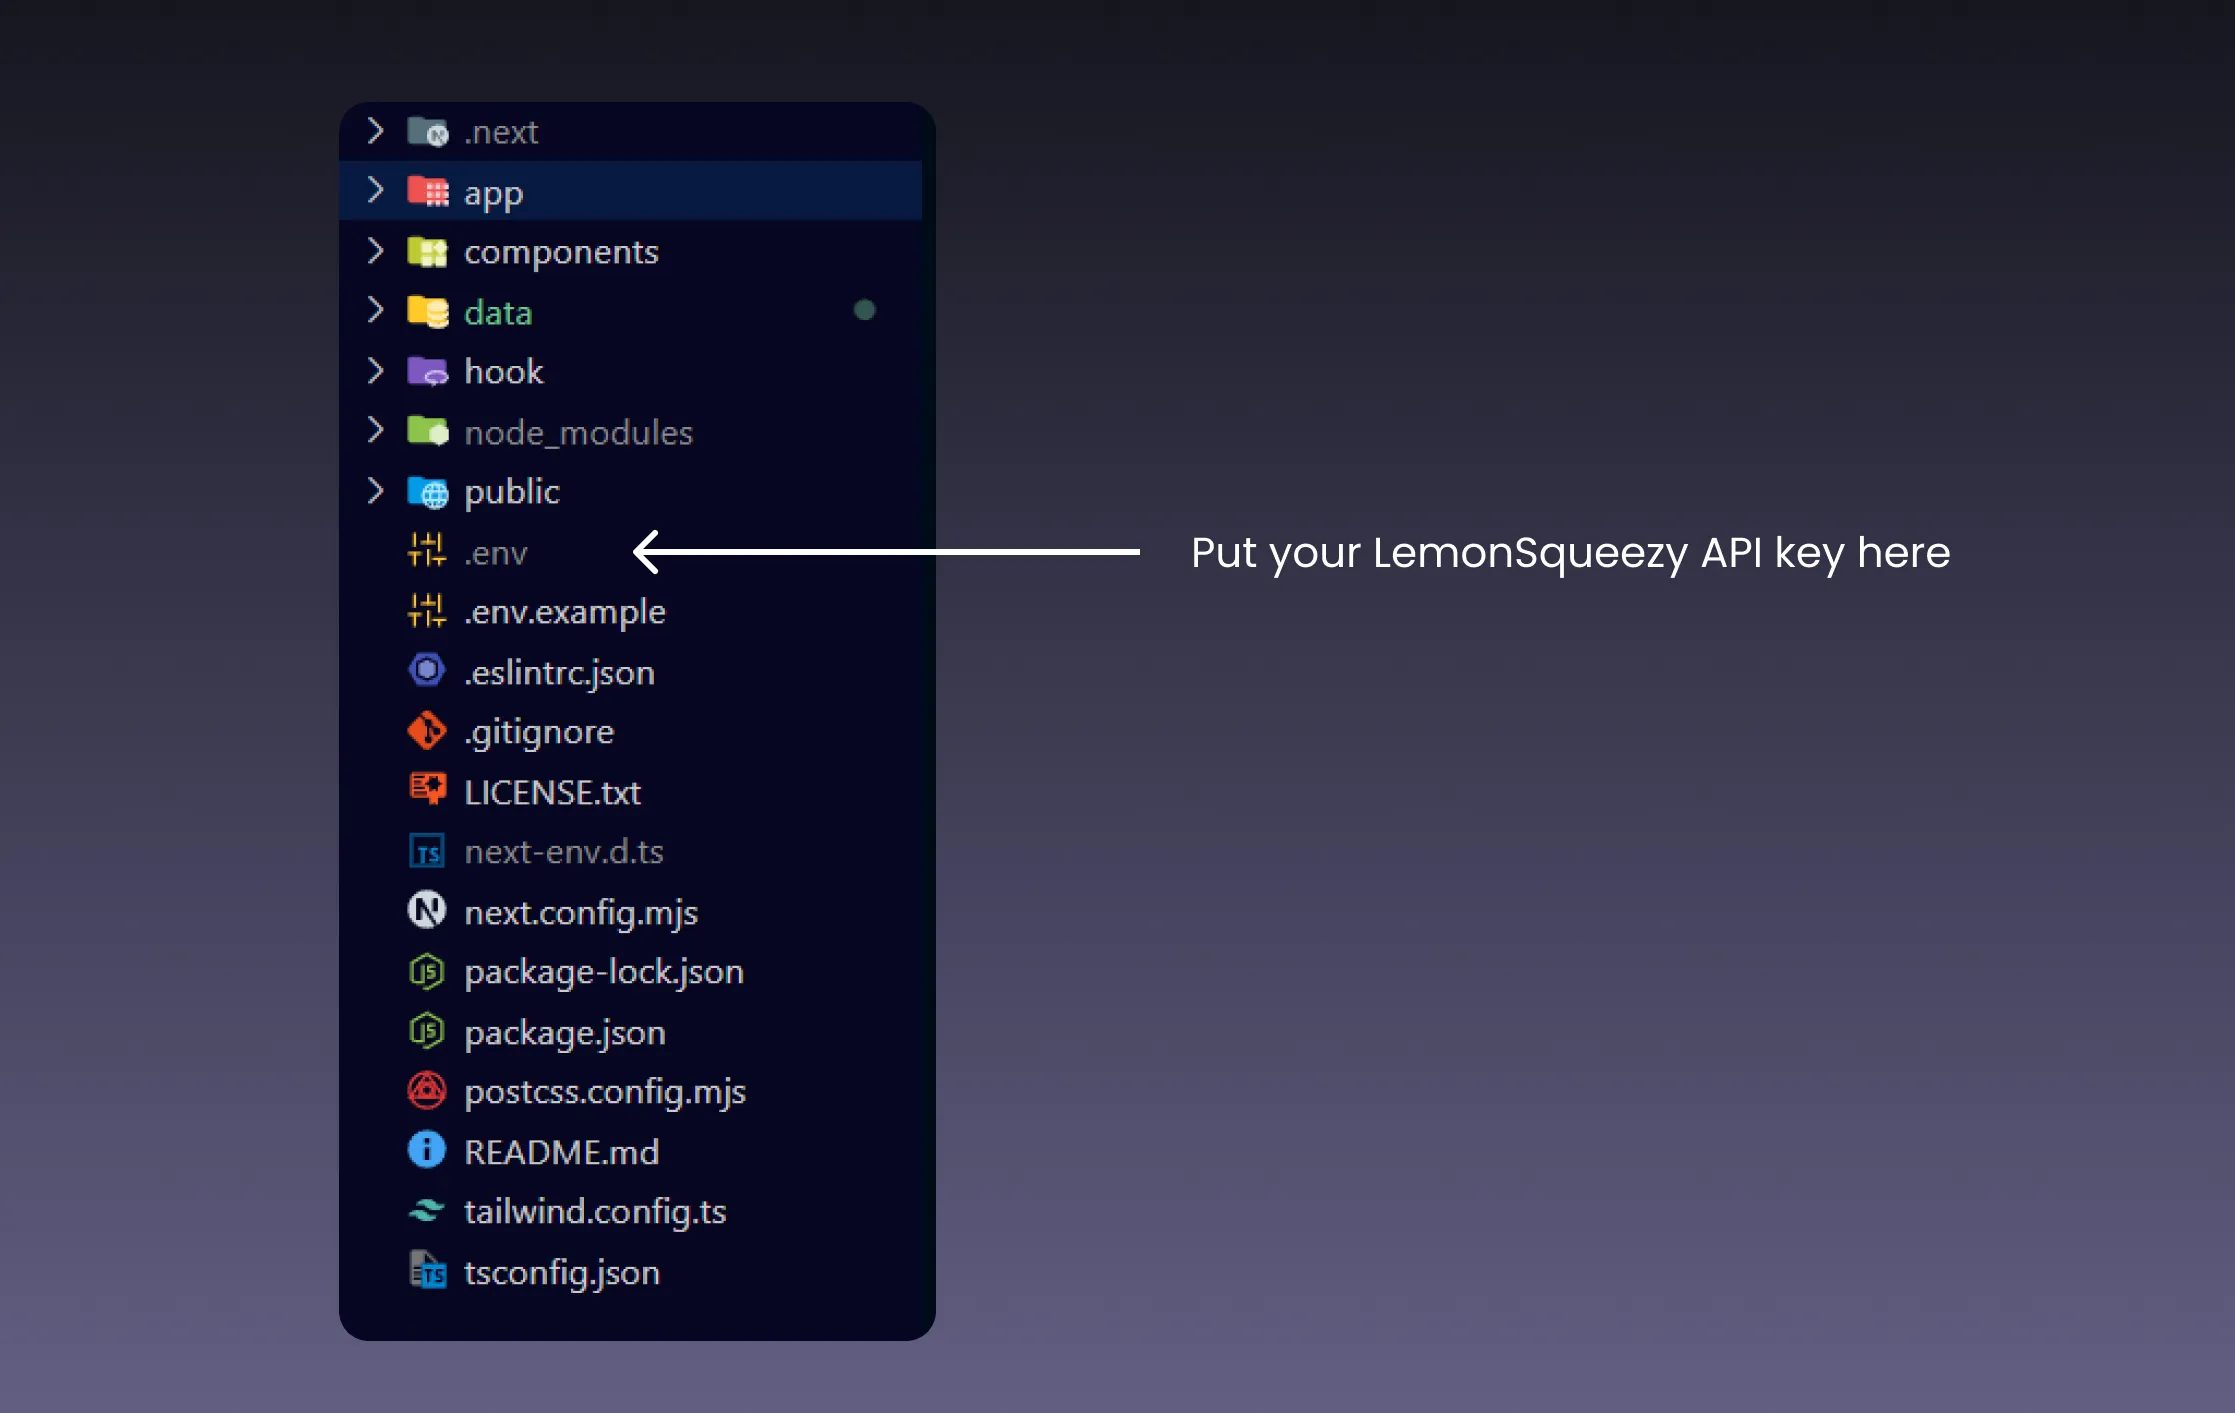
- Create a
.envfile in the root of your project. - Add the following line:
LEMON_SQUEEZY_API_KEY=your_api_key_here
Replace your_api_key_here with the API key you copied earlier.
- Test Your Integration Restart the development server to load the environment variables and see your products fetched from Lemon Squeezy.
Extending product data
The Lemon Squeezy dashboard allows limited customization of product data. To enhance your store’s functionality, use the data/metadata.json file for additional information. This includes:
- Categories: Add custom categories like
trending,new arrivals, orbestsellers. - Variants: Define product variations (e.g., sizes, colors) with names and links.
- Images: Include high-quality images for product galleries.
- Details: Add detailed product descriptions and technical information.
Example metadata.json entry:
{
  "id": "12345",
  "availability": true,
  "sale": true,
  "category": ["trending", "bestsellers"],
  "original_price": "$50",
  "variant": {
    "size": [
      { "name": "Small", "link": "https://example.com/small" },
      { "name": "Medium", "link": "https://example.com/medium" }
    ]
  },
  "info": {
    "Material": "100% Cotton",
    "Care Instructions": "Machine washable"
  },
  "images": ["https://example.com/image1.jpg", "https://example.com/image2.jpg"]
}
Customizing the site
To personalize your store’s content and design, edit the following files:
data/site.ts: Update the global site settings, including the site name, hero section, and footer content.data/sidebar.ts: Modify the sidebar content, including categories and quick links.
To customize the core pages of your store, update these files:
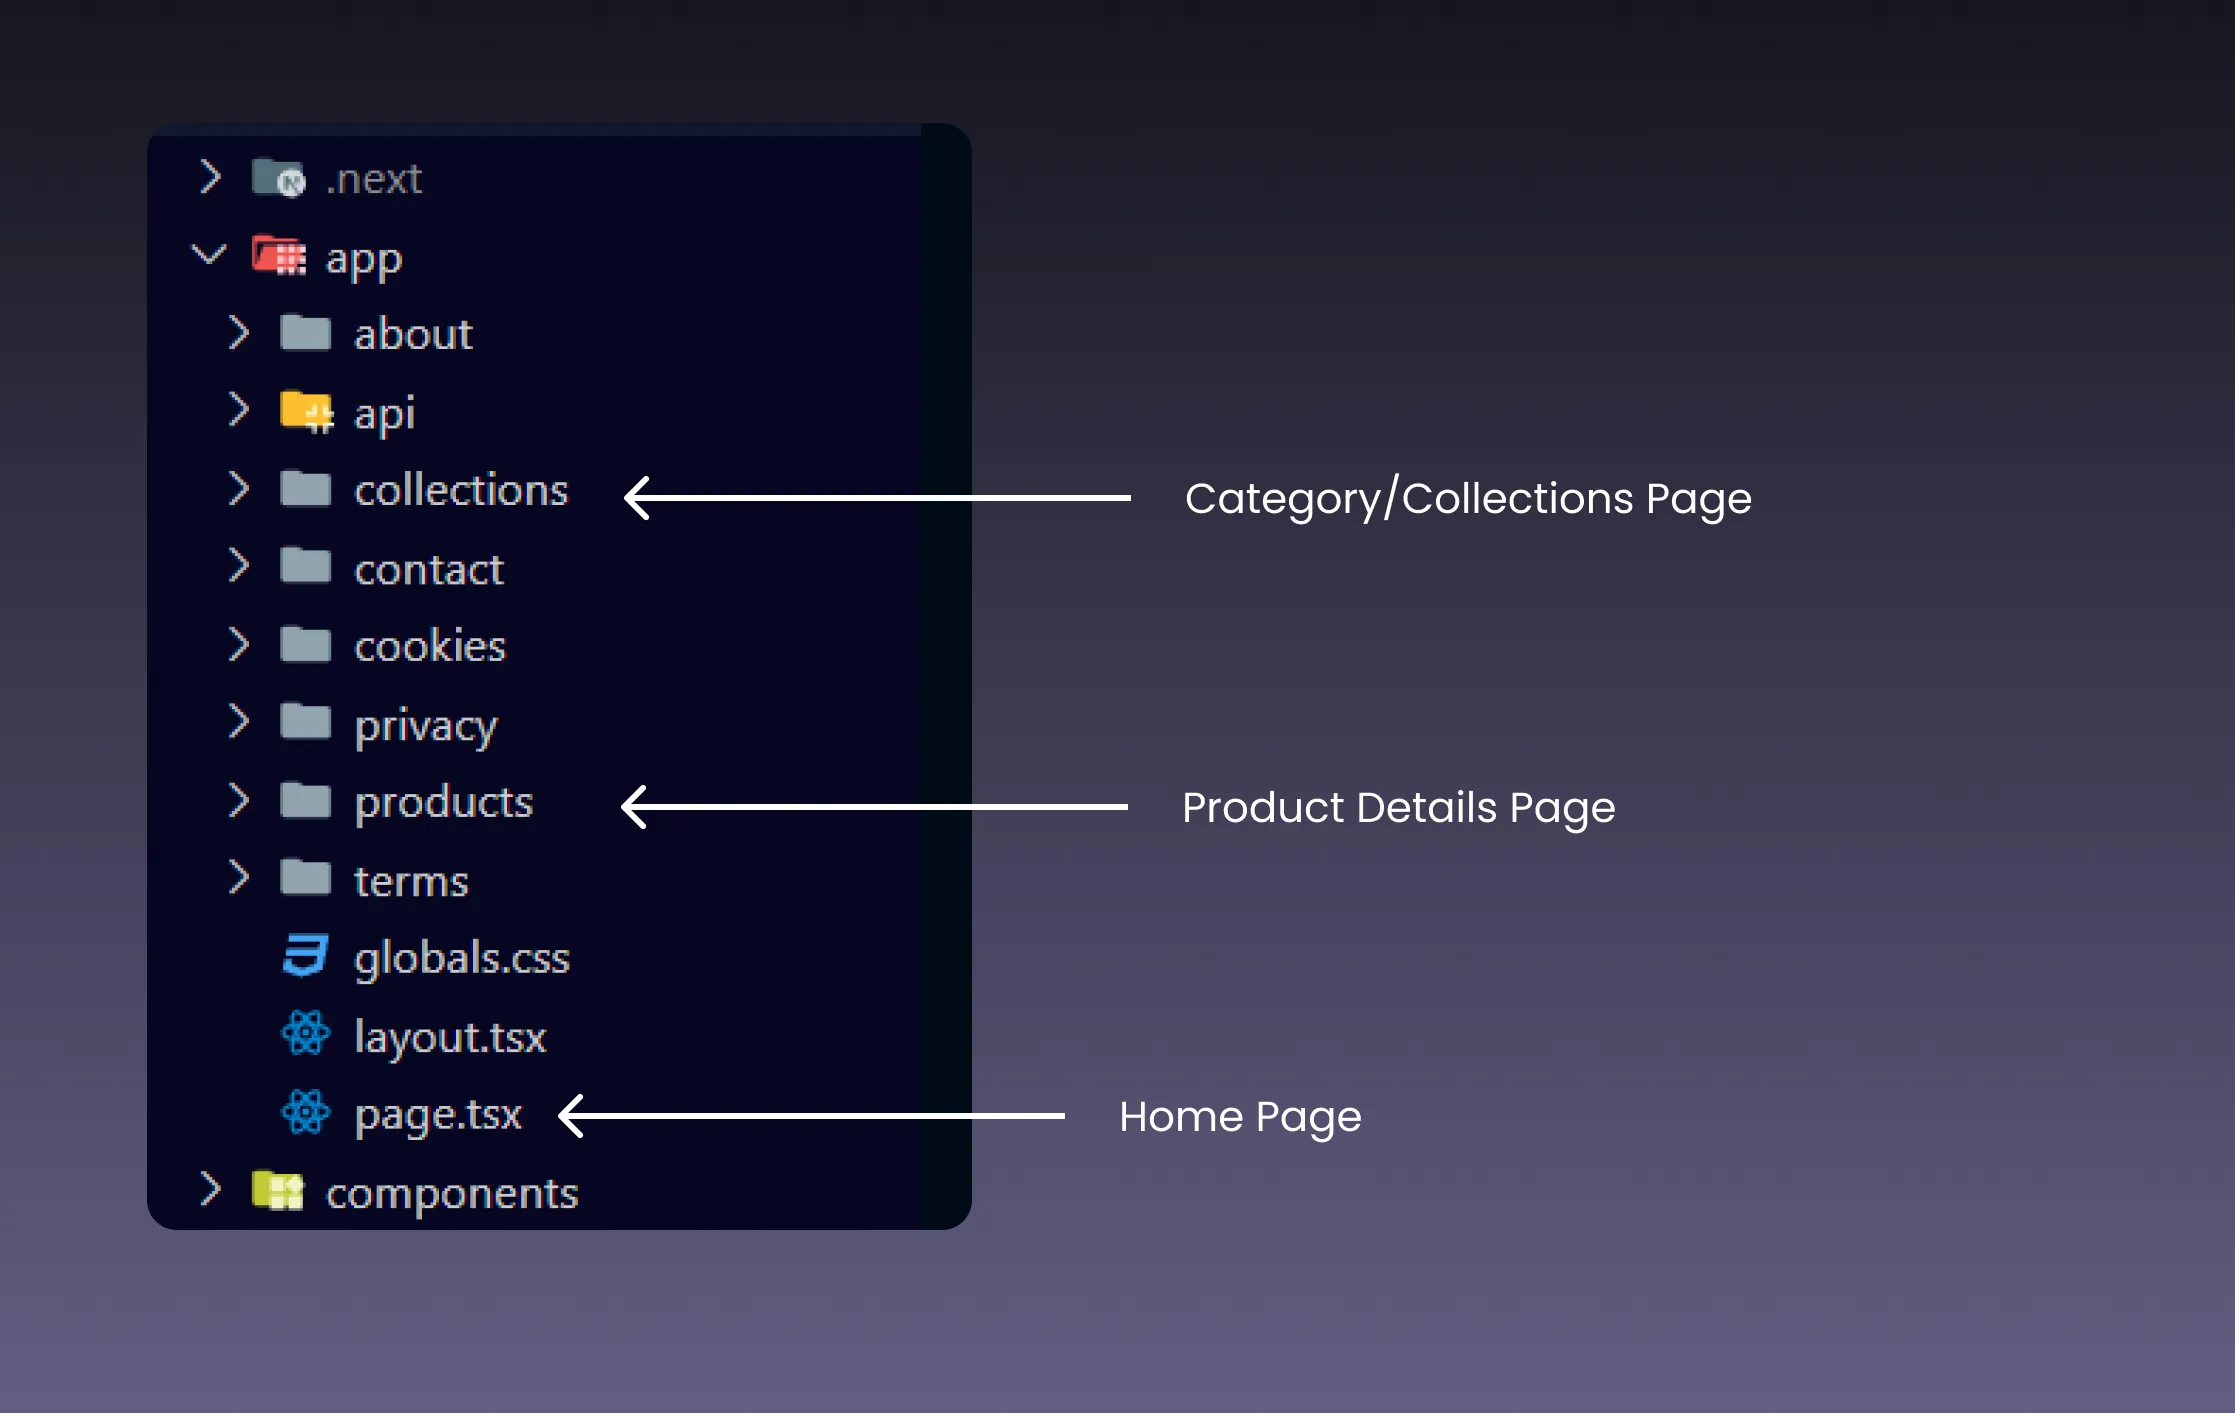
Homepage (
/page.tsx):- Navigate to the
app/page.tsxfile. - Update the hero section, featured products, and banners to reflect your brand.
Example snippet from
page.tsx:export default async function Home() { return ( <div> <Hero /> <Features /> <TrendingProducts /> <Categories /> <OfferCard /> <NewArrivals /> <NewsLetter /> </div> ); }- Navigate to the
Category and Collection Pages (
/collections/[slug].tsx):- Located in
app/collections/[slug].tsx, this file controls category and collection pages. - Use this file to manage the display of products dynamically based on categories.
- Located in
Product Details Page (
/products/[slug].tsx):- Located in
app/products/[slug].tsx, this file handles individual product details. - This page dynamically displays product images, information, and variants.
Example product details layout:
const ProductDetails = () => { return ( <div className="pb-20"> <div className="mt-10 flex flex-col"> <div className="flex flex-col lg:grid gap-6 lg:gap-12 lg:grid-cols-2"> <ProductImage params={{ slug: slug as string }} /> </div> </div> </div> ); };- Located in
3. Build your site for production
Once you're happy with your store, it's time to build it for production:
npm run buildThis command will optimize and generate your site’s static assets, ready for deployment.
4. Deployment options
Now that your store is built, you can deploy it using one of the following platforms:
It can also be deployed anywhere Next.js works. For more details, refer to the Next.js deployment documentation.
Conclusion
The "Online Store Template" by daisyUI simplifies the process of building and managing an online store. With Lemon Squeezy API and customizable JSON metadata, you have the flexibility to create a store that meets your unique needs. Start building your store today and take your business to the next level!
Need help?
If you have questions or need assistance, join our Discord community. We’re here to help you get started and troubleshoot any issues.