Install daisyUI for WordPress
How to install Tailwind CSS and daisyUI in a WordPress project
1. Create a new WordPress project
Install WordPress according to the Official WordPress guide.
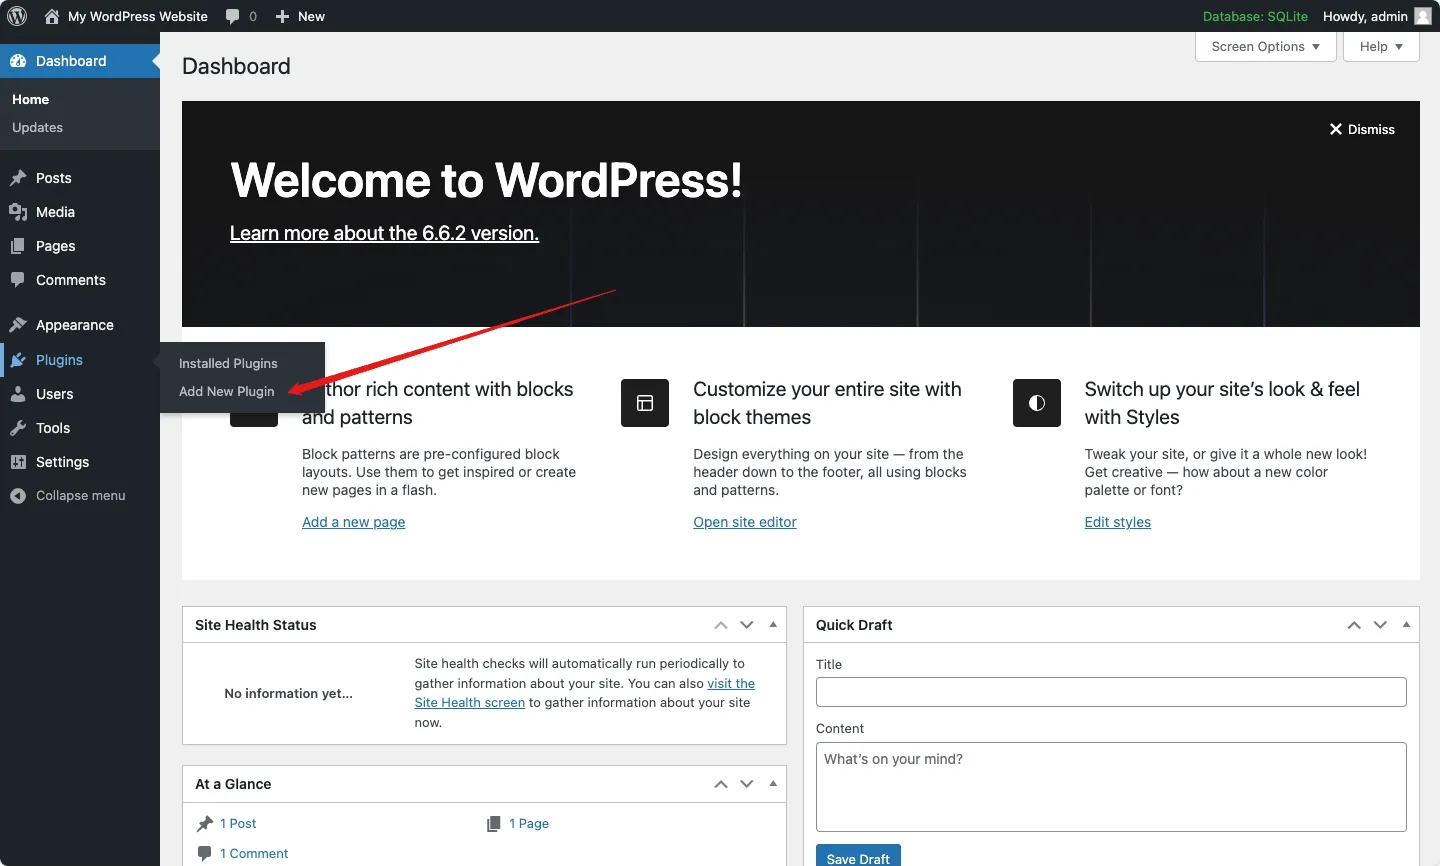
2. Install the WindPress plugin
In this guide, we will use the WindPress plugin to install Tailwind CSS and daisyUI in a WordPress project.
Navigate to the Plugins → Add New Plugin sub-menu.
Search for the WordPress plugin by typing WindPress in the search bar.
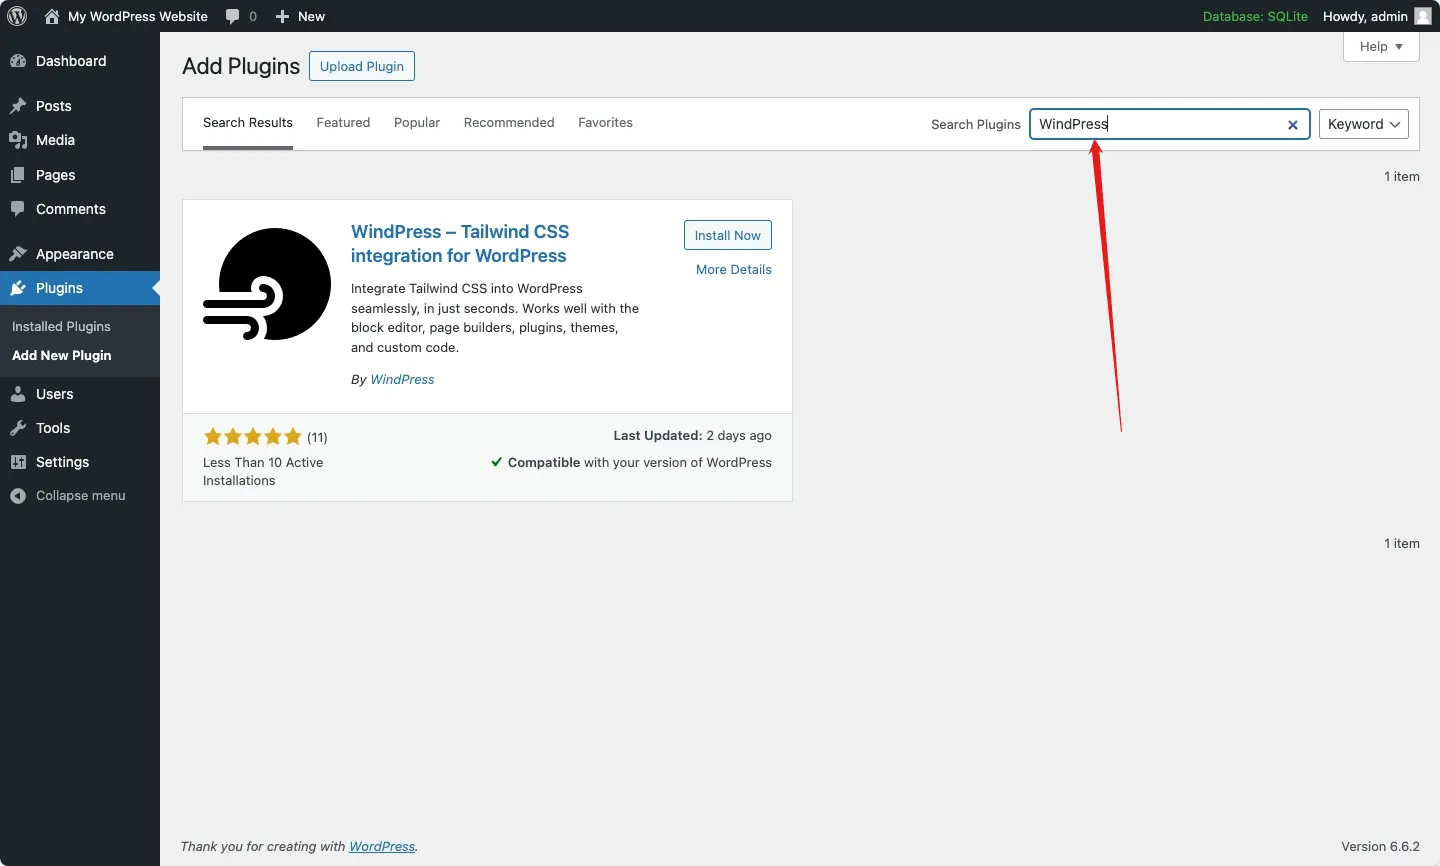
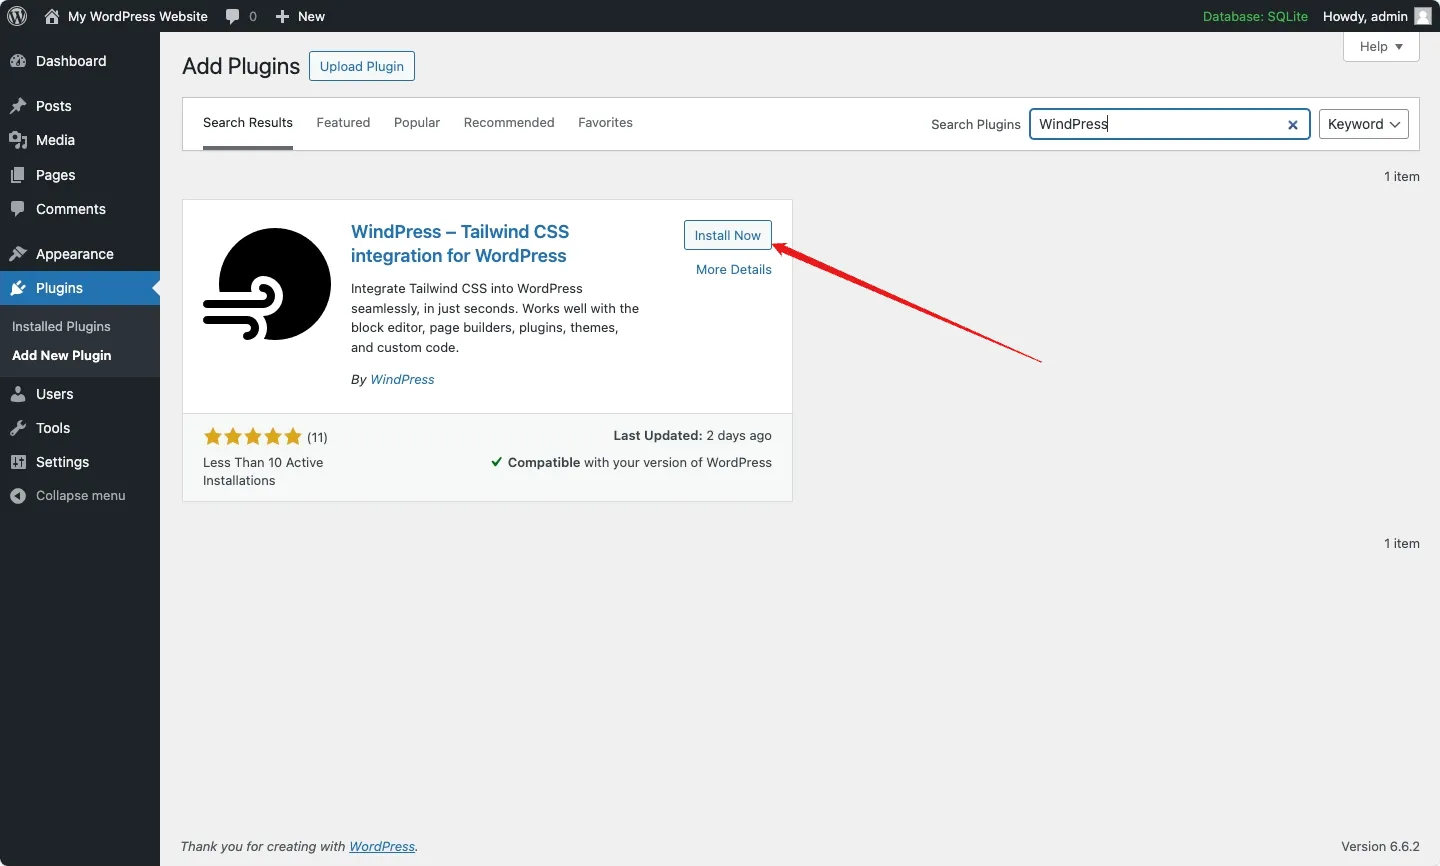
Click the Install Now button to install the WordPress plugin.
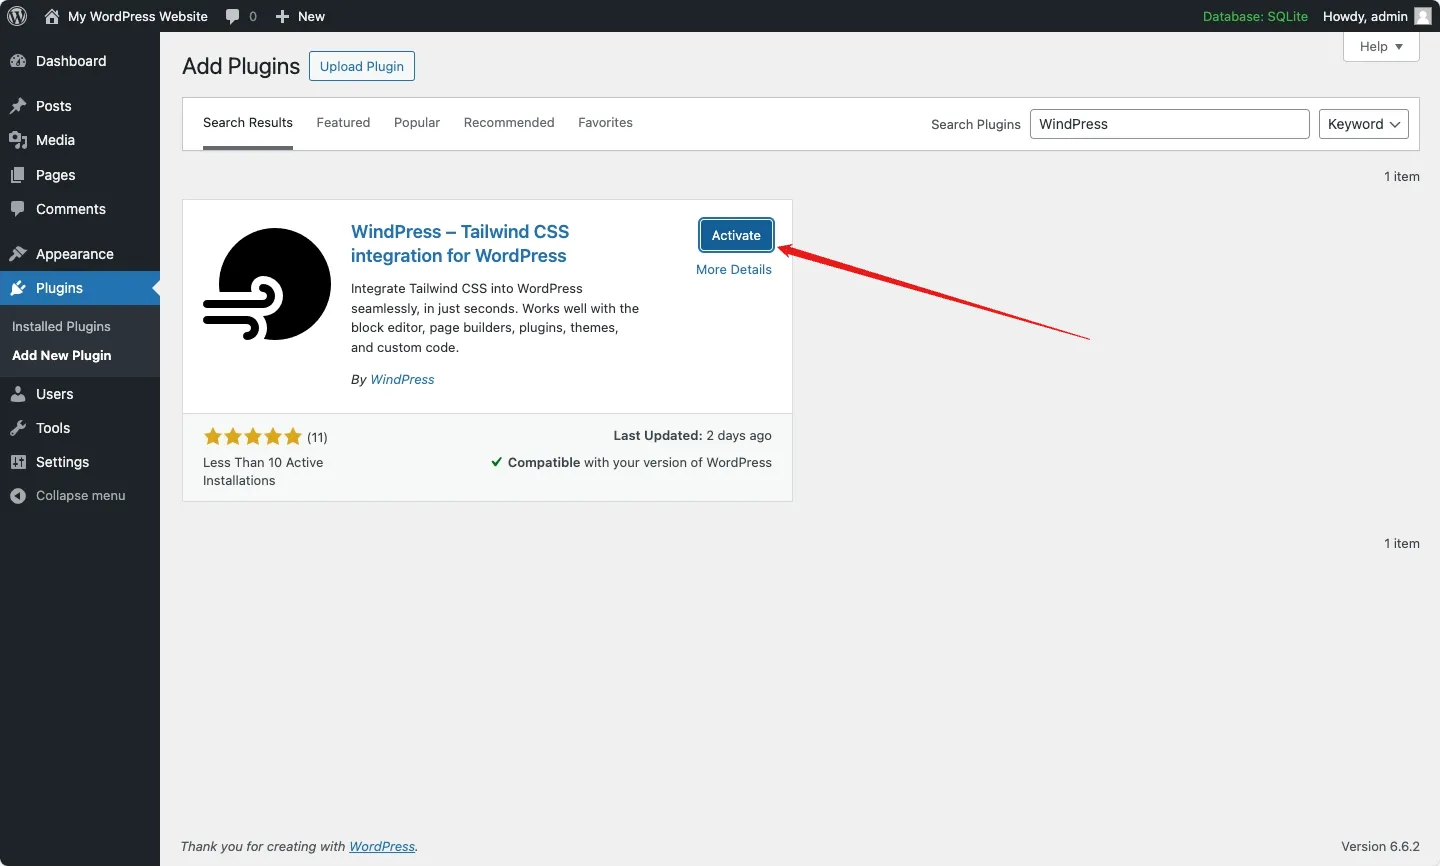
Once the plugin is installed, click the Activate button to activate the WindPress plugin.
3. Install daisyUI
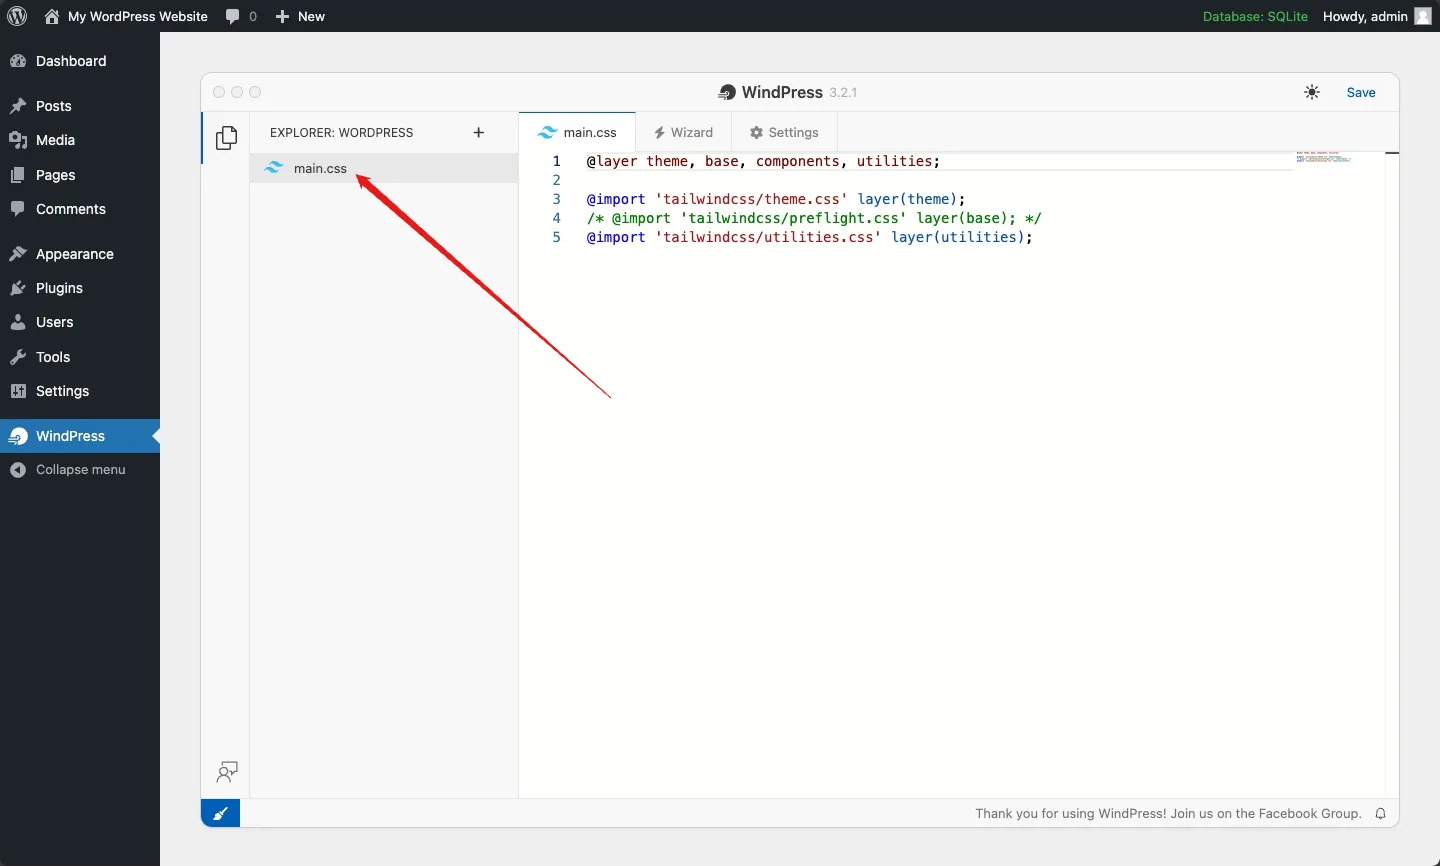
Navigate to the WindPress dashboard by clicking the WindPress menu item in the WordPress admin sidebar.
Then, click the main.css file on the explorer sidebar to open the file editor.
Add daisyUI at the end of code in the main.css file
@plugin "daisyui";Now you can use daisyUI class names!